

安装LaTex
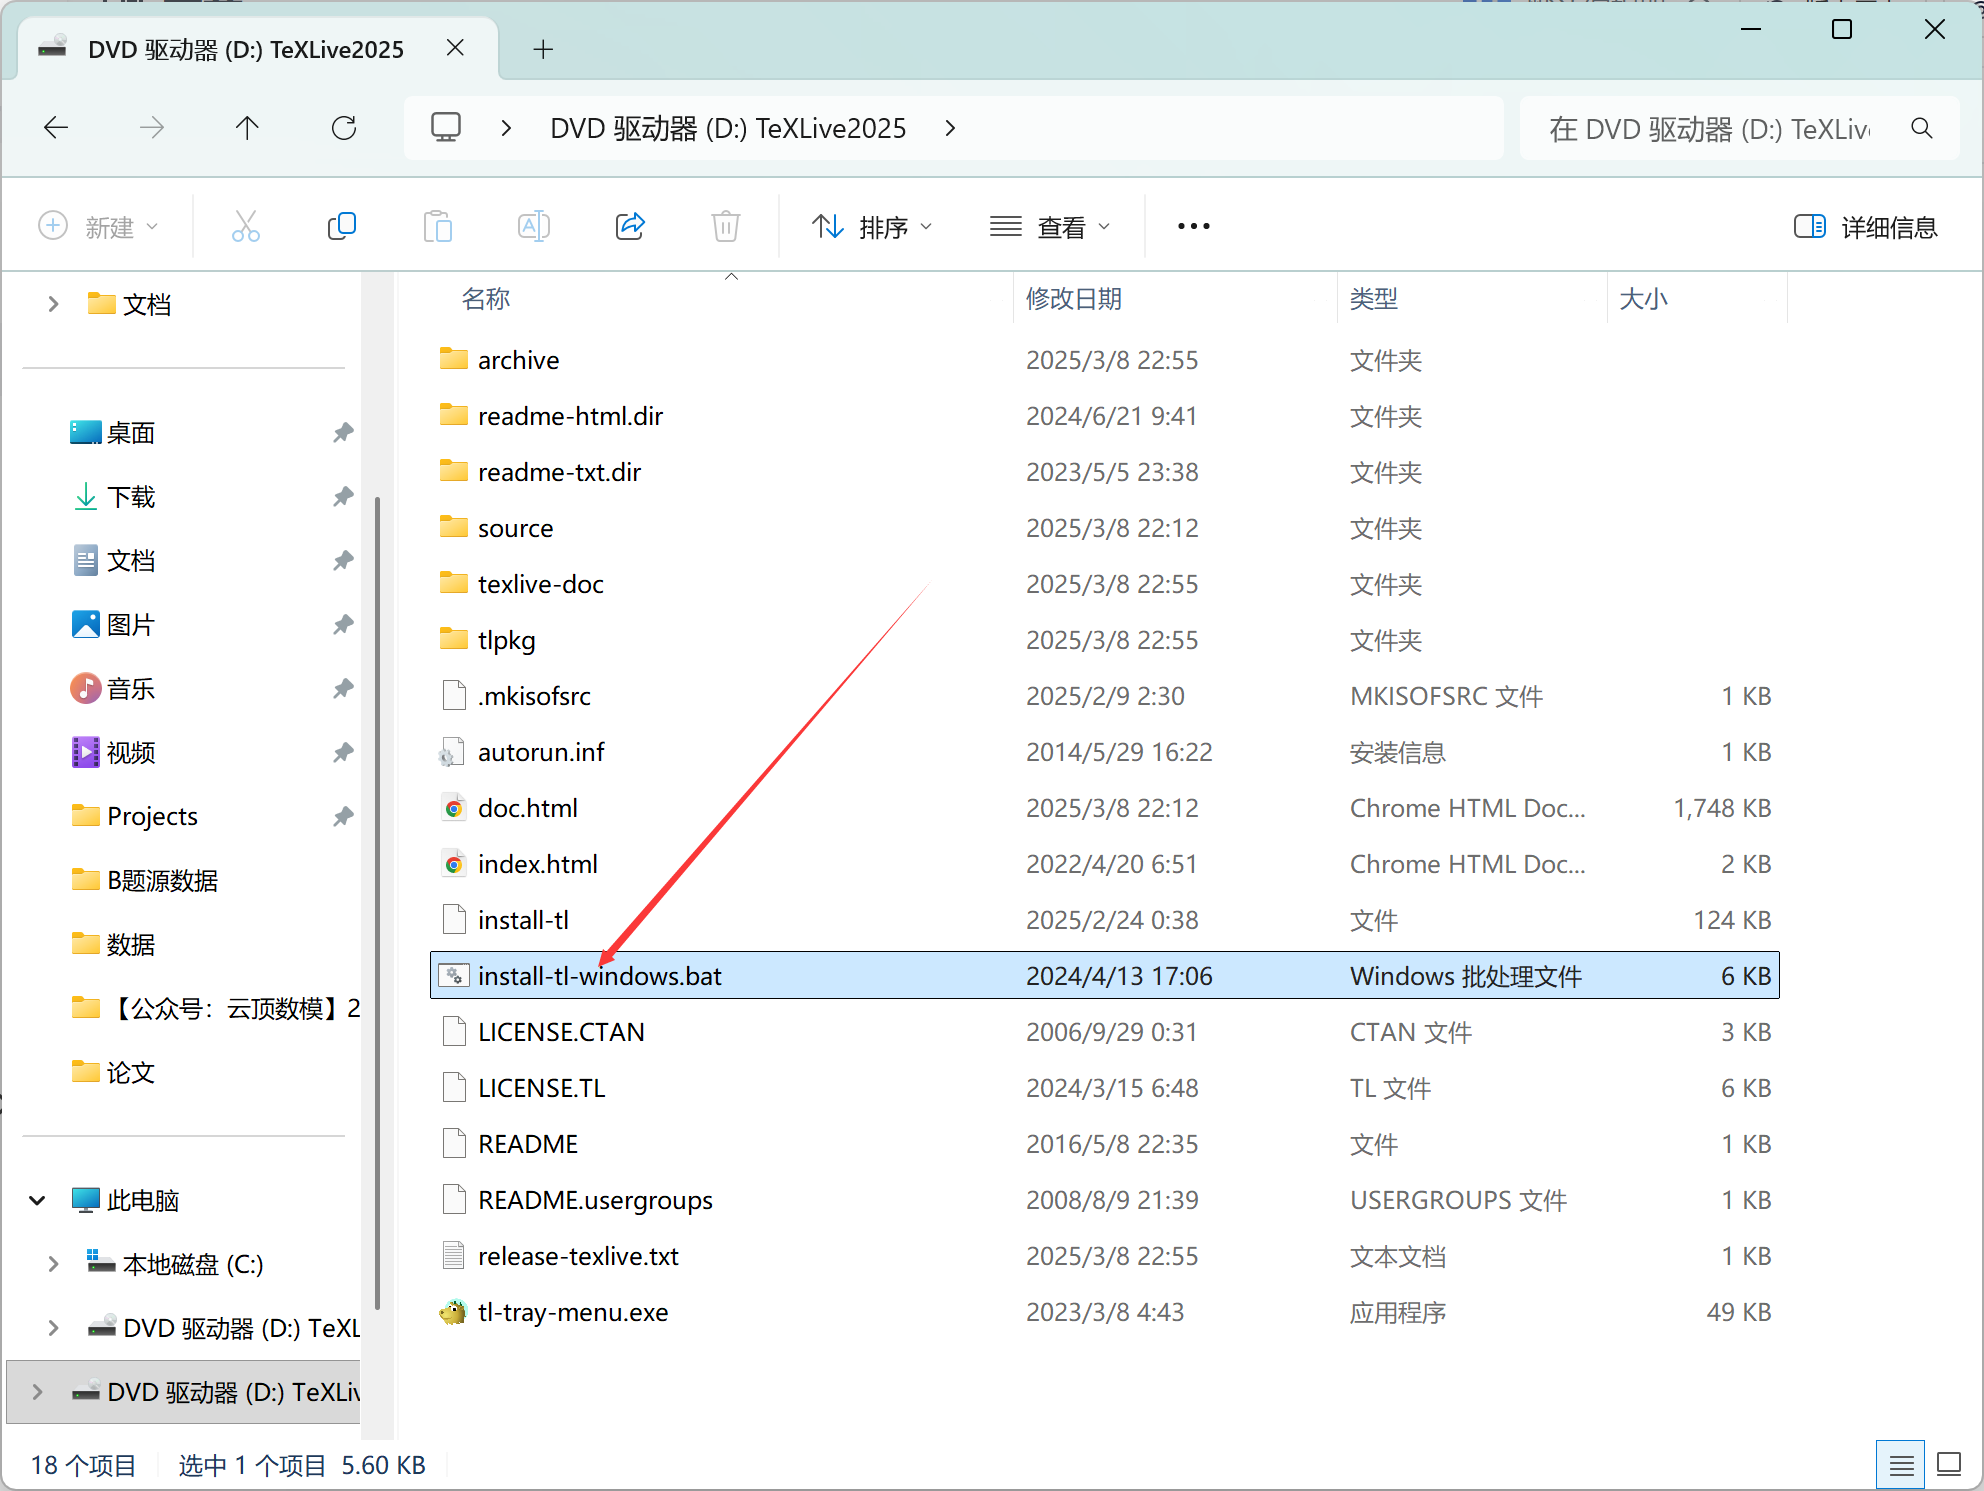
这里推荐直接下载镜像,下载链接:https://mirrors.cloud.tencent.com/CTAN/systems/texlive/Images/texlive.iso
下载完成后双击打开install-tl-windows.bat并点击安装即可(后续遇到权限问题,以管理员身份运行即可)
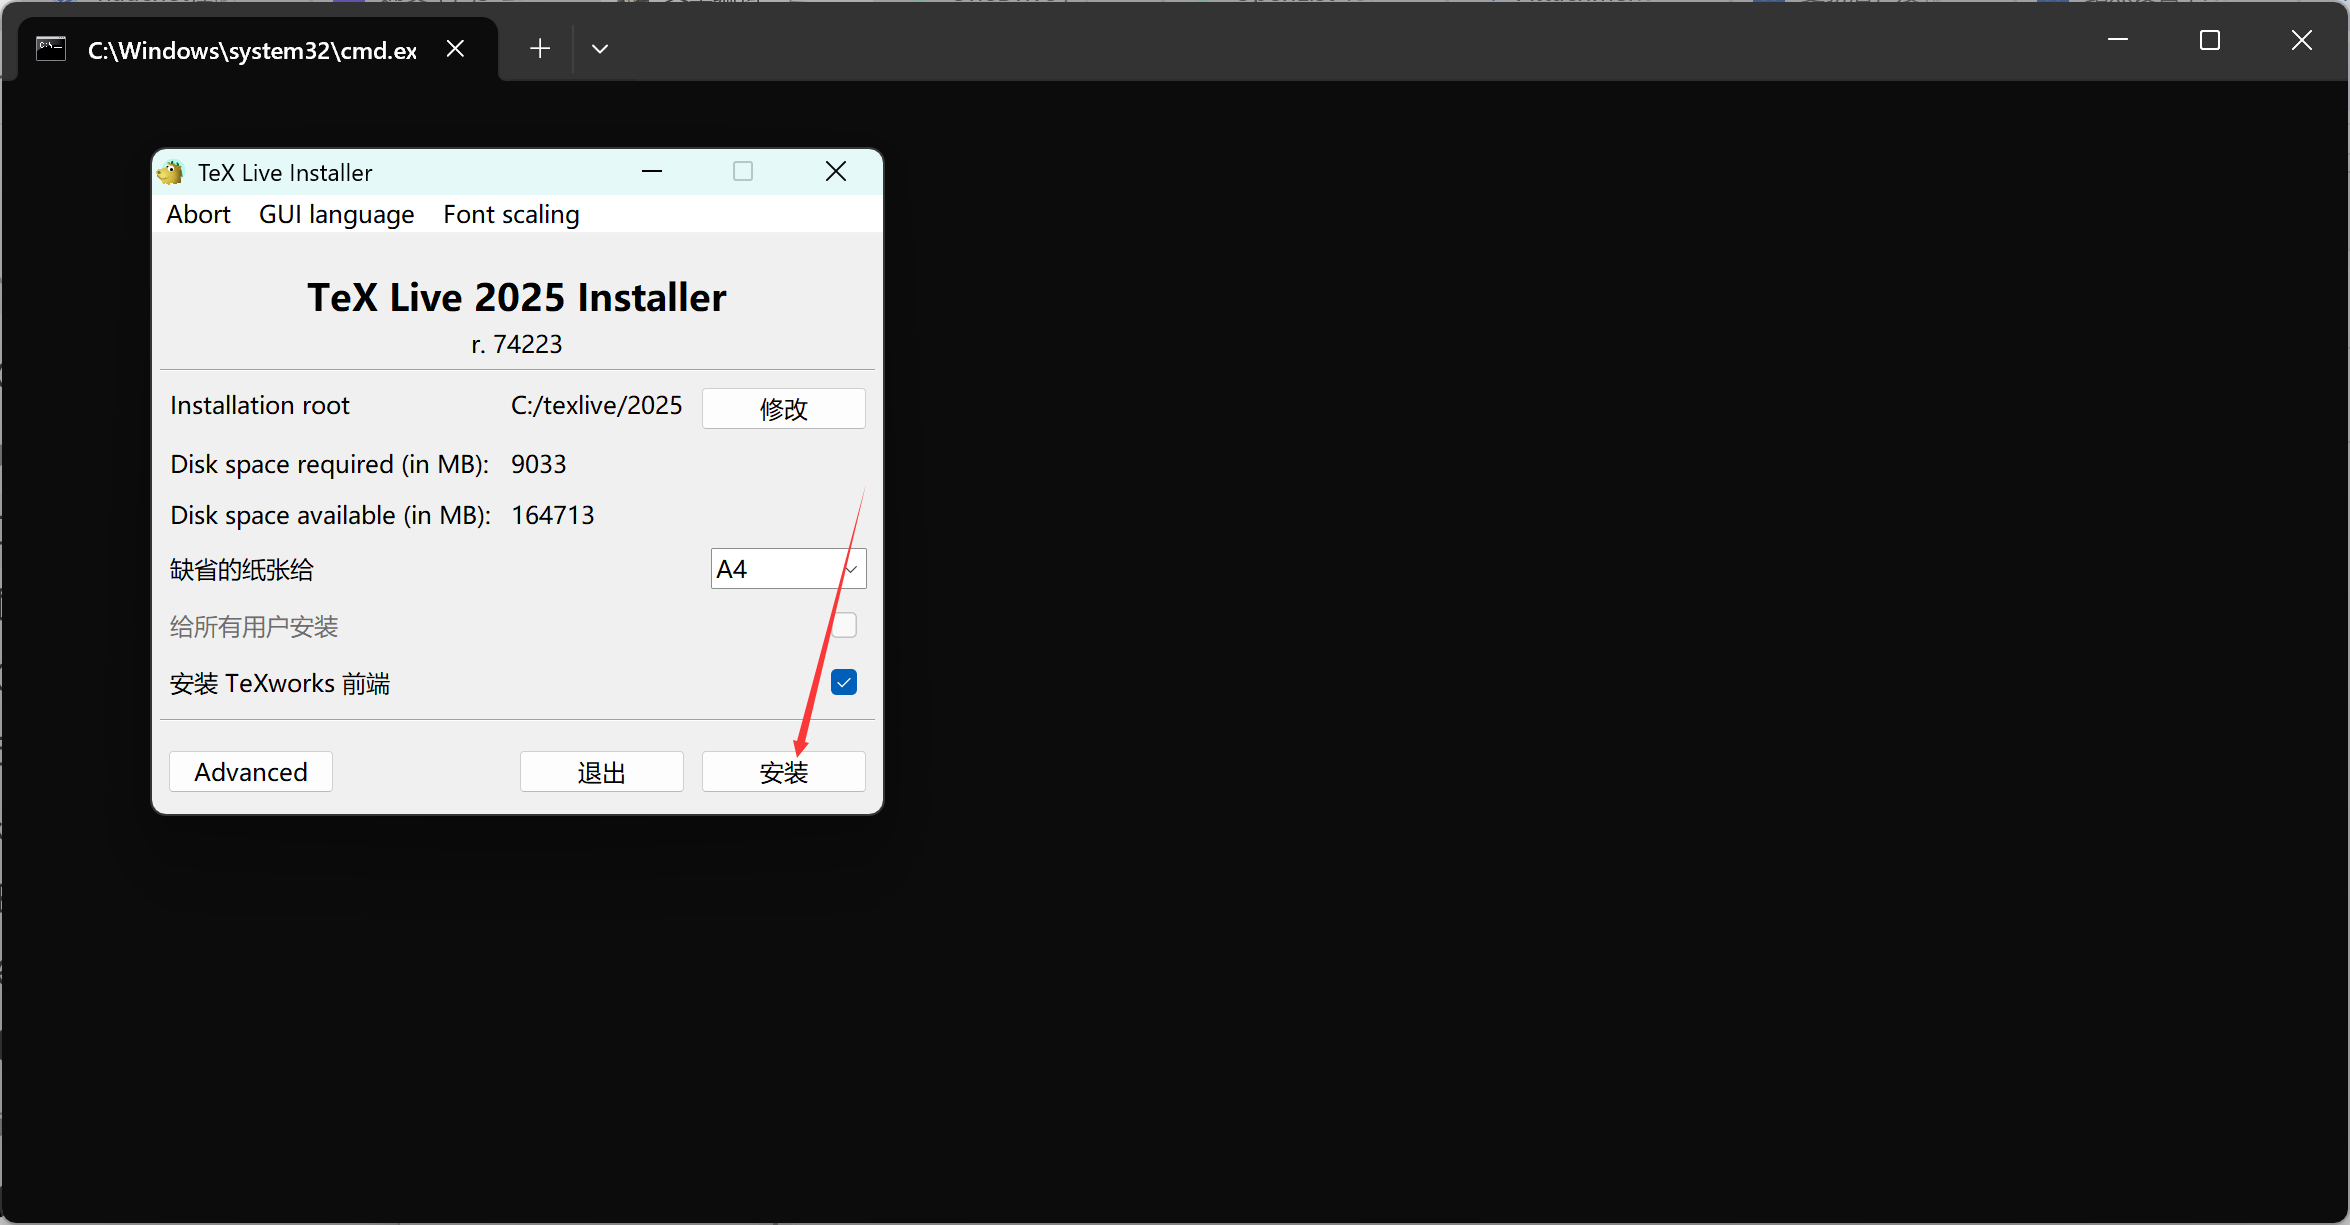
安装完成后
安装完成后我们需要配置环境变量和vscode插件
在系统Path变量中添加C:\texlive\2025\bin\windows

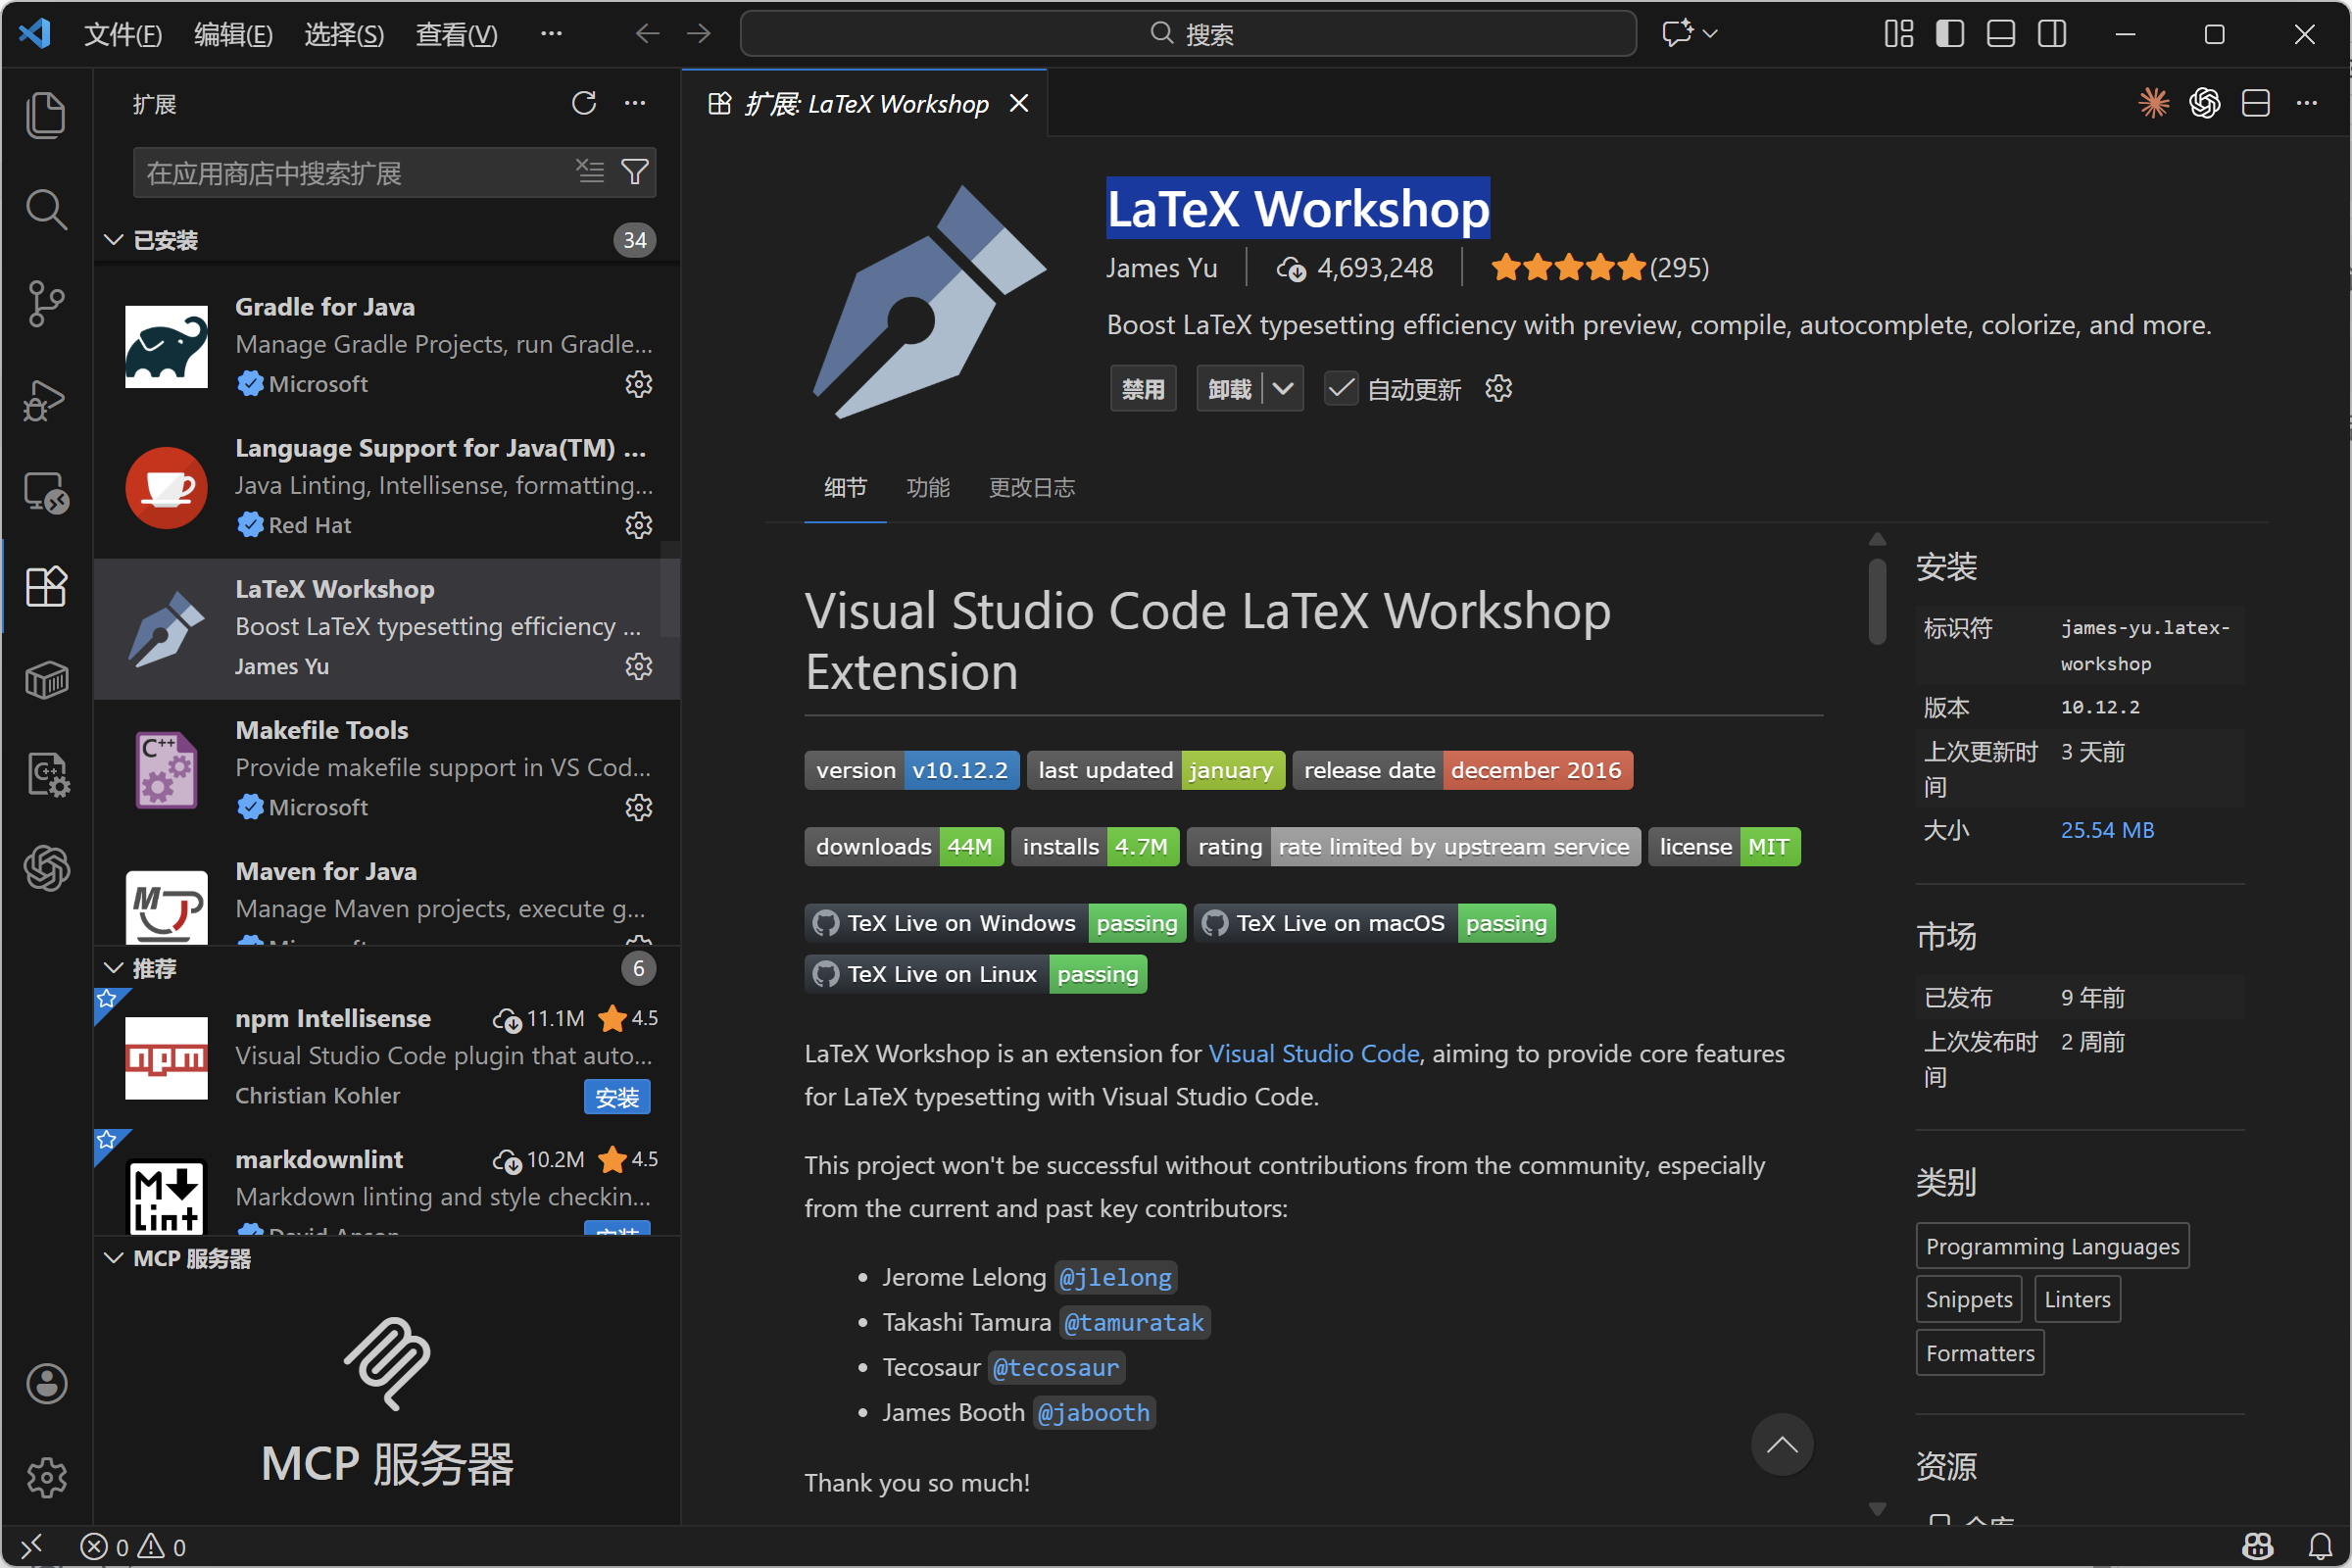
打开vscode,搜索并安装LaTeX Workshop
点击左下角设置
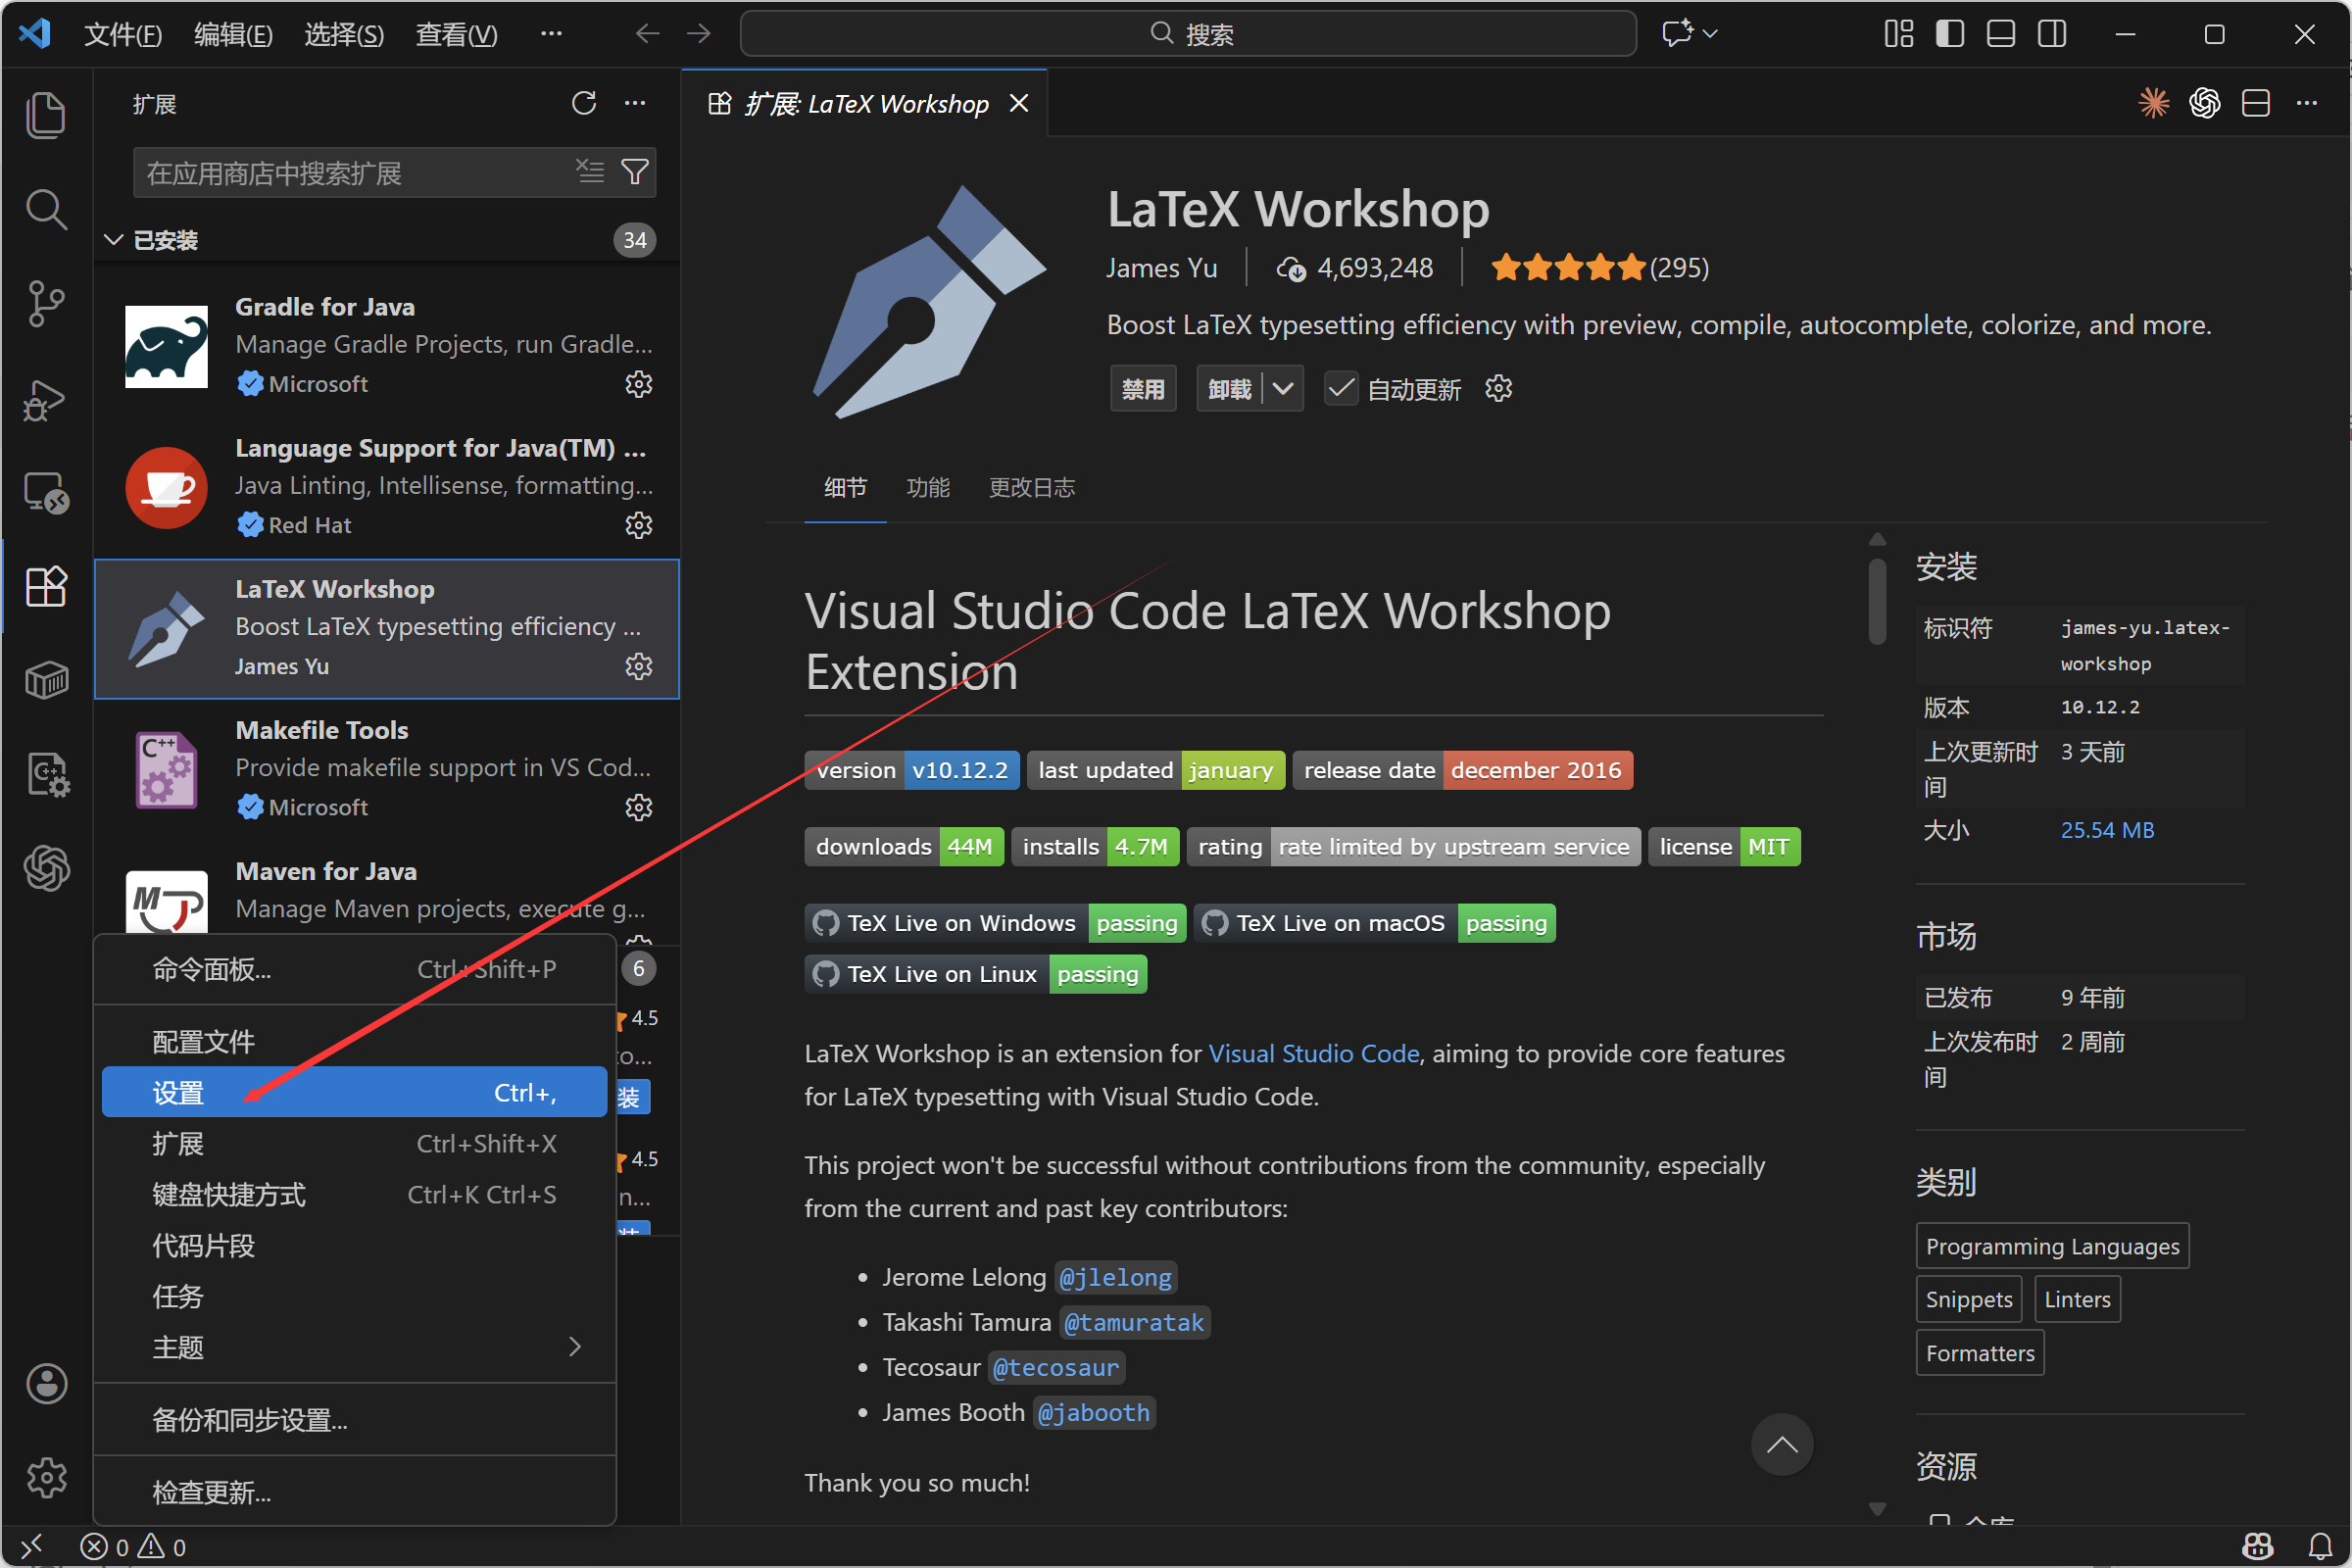
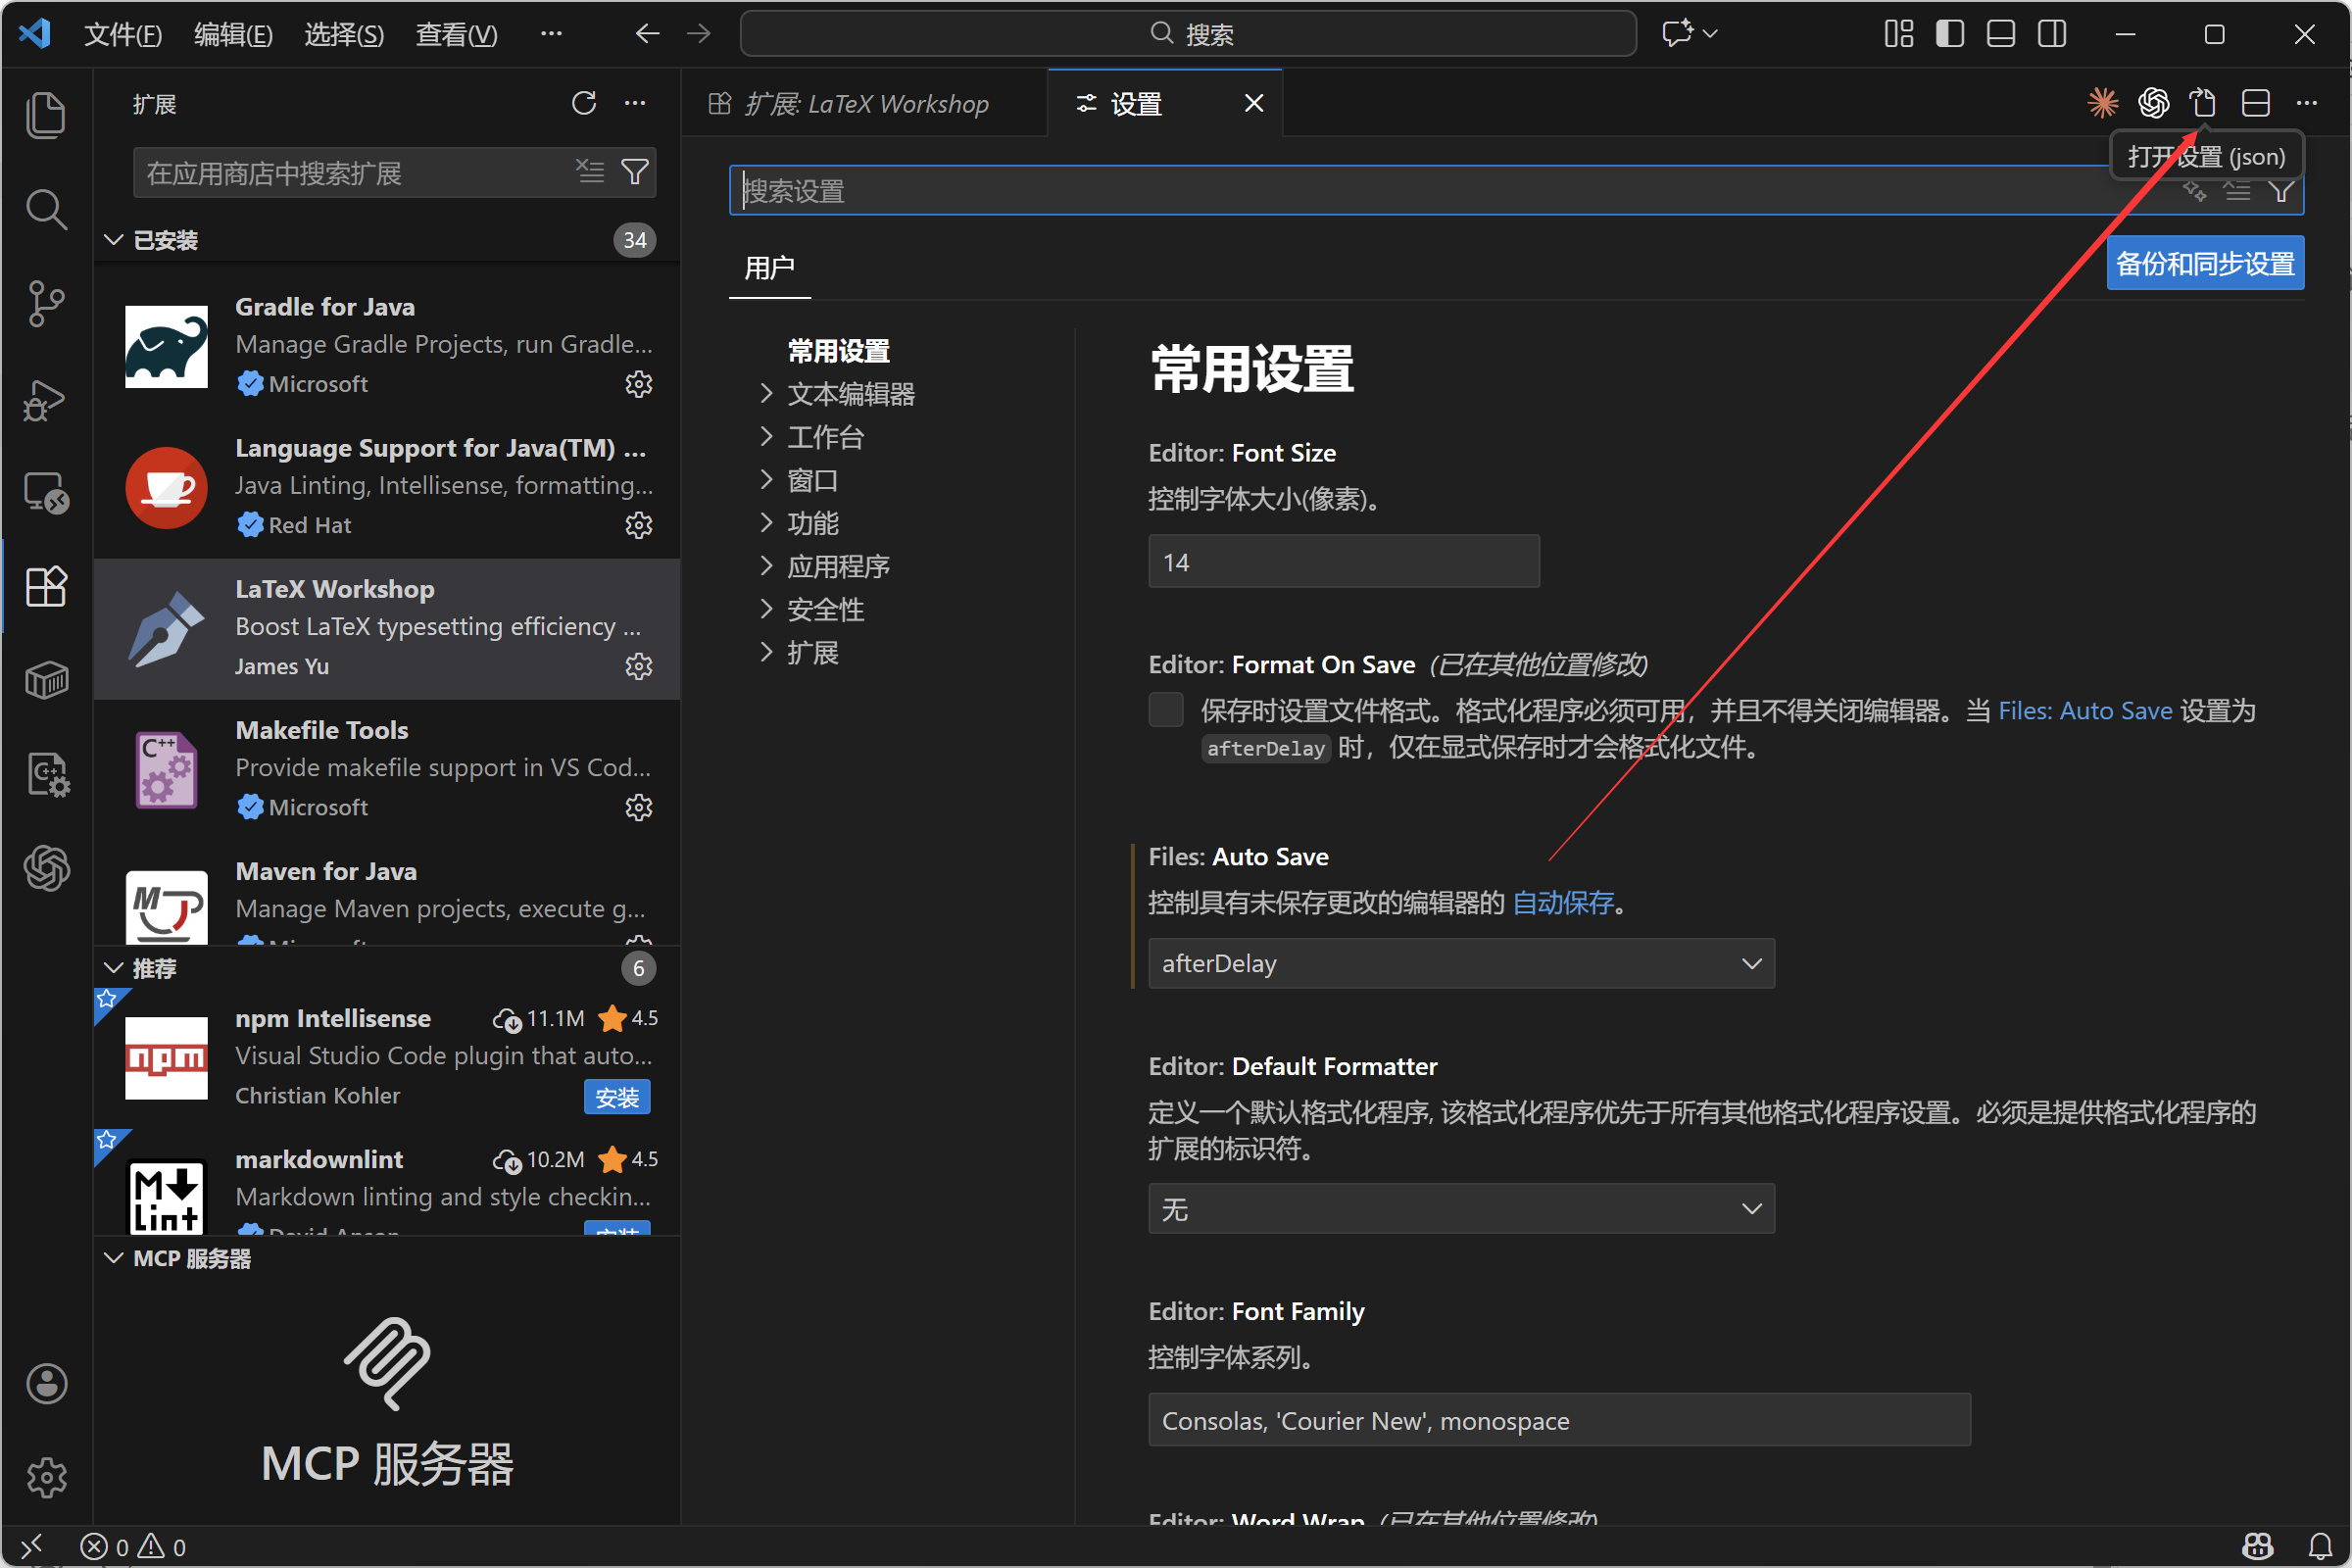
在{}中添加如下配置(如果原有内容就在原内容下继续加):
 "latex-workshop.latex.tools": [
        {
            "name": "xelatex",
            "command": "xelatex",
            "args": [
                "-synctex=1",
                "-interaction=nonstopmode",
                "-file-line-error",
                "%DOCFILE%"
            ]
        },
        {
            "name": "bibtex",
            "command": "bibtex",
            "args": [
                "%DOCFILE%"
            ]
        }
    ],

    // 2. 定义编译链 (配方)
    "latex-workshop.latex.recipes": [
        {
            "name": "XeLaTeX",
            "tools": [
                "xelatex"
            ]
        },
        {
            "name": "XeLaTeX -> BibTeX -> XeLaTeX*2",
            "tools": [
                "xelatex",
                "bibtex",
                "xelatex",
                "xelatex"
            ]
        }
    ],

    // 3. 其他优化设置
    "latex-workshop.latex.recipe.default": "lastUsed", // 默认使用上次选的编译方式
    "latex-workshop.latex.autoBuild.run": "onFileChange", // 文件修改保存时自动编译
    "latex-workshop.view.pdf.viewer": "tab", // PDF 在 VS Code 内部标签页打开
    "latex-workshop.showContextMenu": true // 启用右键菜单
开始使用
首先我们创建一个的tex文件,并输入基础内容(我这里以美赛为例,使用mcmthesis)
%% MCM/ICM Paper Template
%%
\documentclass{mcmthesis}
\mcmsetup{CTeX = false,   % 使用英文宏包
          tcn = {1234567}, % 你的队伍控制号
          problem = A,     % 选题 (A/B/C/D/E/F)
          sheet = true,    % 是否输出摘要页
          titleinsheet = true, % 摘要页是否包含标题
          keywordsinsheet = true, % 摘要页是否包含关键词
          titlepage = false,
          abstract = true}

\usepackage{newtxtext}     % Times New Roman 字体
\usepackage{amsmath, amssymb, amsthm}
\usepackage{geometry}
\setlength{\headheight}{14pt}
\usepackage{graphicx}
\usepackage{float}
\usepackage{booktabs}      % 三线表
\usepackage{tabularx}      % 自动宽度的表格
\usepackage{longtable}     % 长表格
\usepackage{hyperref}      % 超链接
\usepackage{xcolor}
\usepackage{listings}      % 代码块
\usepackage{lipsum}

% 标题设置
\title{Your Paper Title Here}

\begin{document}

% =========================================
% 0. 摘要页 (Summary Sheet)
% =========================================
\begin{abstract}
    % [第一段:背景与核心目标]
    % 引用使用如下格式
    \cite{chen2020global}

    % [Problem 1 摘要]
    For \textbf{Problem 1},

    % [Problem 2 摘要]
    For \textbf{Problem 2},

    % [Problem 3 摘要]
    For \textbf{Problem 3},

    % [Problem 4 摘要]
    For \textbf{Problem 4},

    % [结论]
    In conclusion,

    \begin{keywords}
    Keyword 1; Keyword 2; Keyword 3; Algorithm Name; Model Name
    \end{keywords}
\end{abstract}

\maketitle

% =========================================
% 目录
% =========================================
\tableofcontents
\newpage

% =========================================
% 1. Introduction (引言)
% =========================================
\section{Introduction}

\subsection{Background}

\subsection{Problem Restatement}

\subsection{Literature Review}

\subsection{Our Work}

% =========================================
% 2. Assumptions and Notations (假设与符号)
% =========================================
\section{Model Assumptions and Notations}

\subsection{Model Assumptions}

\subsection{Notations}

% =========================================
% 3. Data Pre-processing (数据预处理)
% =========================================
\section{Data Pre-processing}


\section{Model Development}
% =========================================
% 4. Model for Problem 1 (问题1建模)
% =========================================
\subsection{Model for Problem 1:}

% =========================================
% 5. Model for Problem 2 (问题2建模)
% =========================================
\subsection{Model for Problem 2:}

% =========================================
% 6. Model for Problem 3 (问题3建模)
% =========================================
\subsection{Model for Problem 3:}

% =========================================
% 7. Model for Problem 4 (问题4建模)
% =========================================
\subsection{Model for Problem 4:}

% =========================================
% 8. Sensitivity Analysis (灵敏度分析)
% =========================================
\section{Sensitivity Analysis}

% =========================================
% 10. Model Extension (模型推广)
% =========================================
\section{Model Extension}

% =========================================
% 9. Conclusion (结论)
% =========================================
\section{Conclusion}

% =========================================
% References (参考文献)
% =========================================
\bibliographystyle{unsrt}
\bibliography{ref}

% =========================================
% Appendices (附录)
% =========================================
\newpage
\appendix

% ----------------------------------------------------
% 关键修改:将目录深度设为0,禁止Section级别出现在目录中
% ----------------------------------------------------
\addtocontents{toc}{\protect\setcounter{tocdepth}{0}}

\section{Report on Use of AI}
% 必须包含的 AI 使用报告部分
\begin{itemize}
    \item \textbf{OpenAI ChatGPT (GPT-4o)}
    \begin{itemize}
        \item \textbf{Query:} How to implement Entropy Weight Method in Python?
        \item \textbf{Usage:} The code generated was used in Section 5.1 for weight calculation.
    \end{itemize}

    \item \textbf{Perplexity AI}
    \begin{itemize}
        \item \textbf{Query:} Latest statistics on global AI supercomputing power 2025.
        \item \textbf{Usage:} Data retrieved was used in Section 3.1.
    \end{itemize}
\end{itemize}

\label{LastPage}
\end{document}
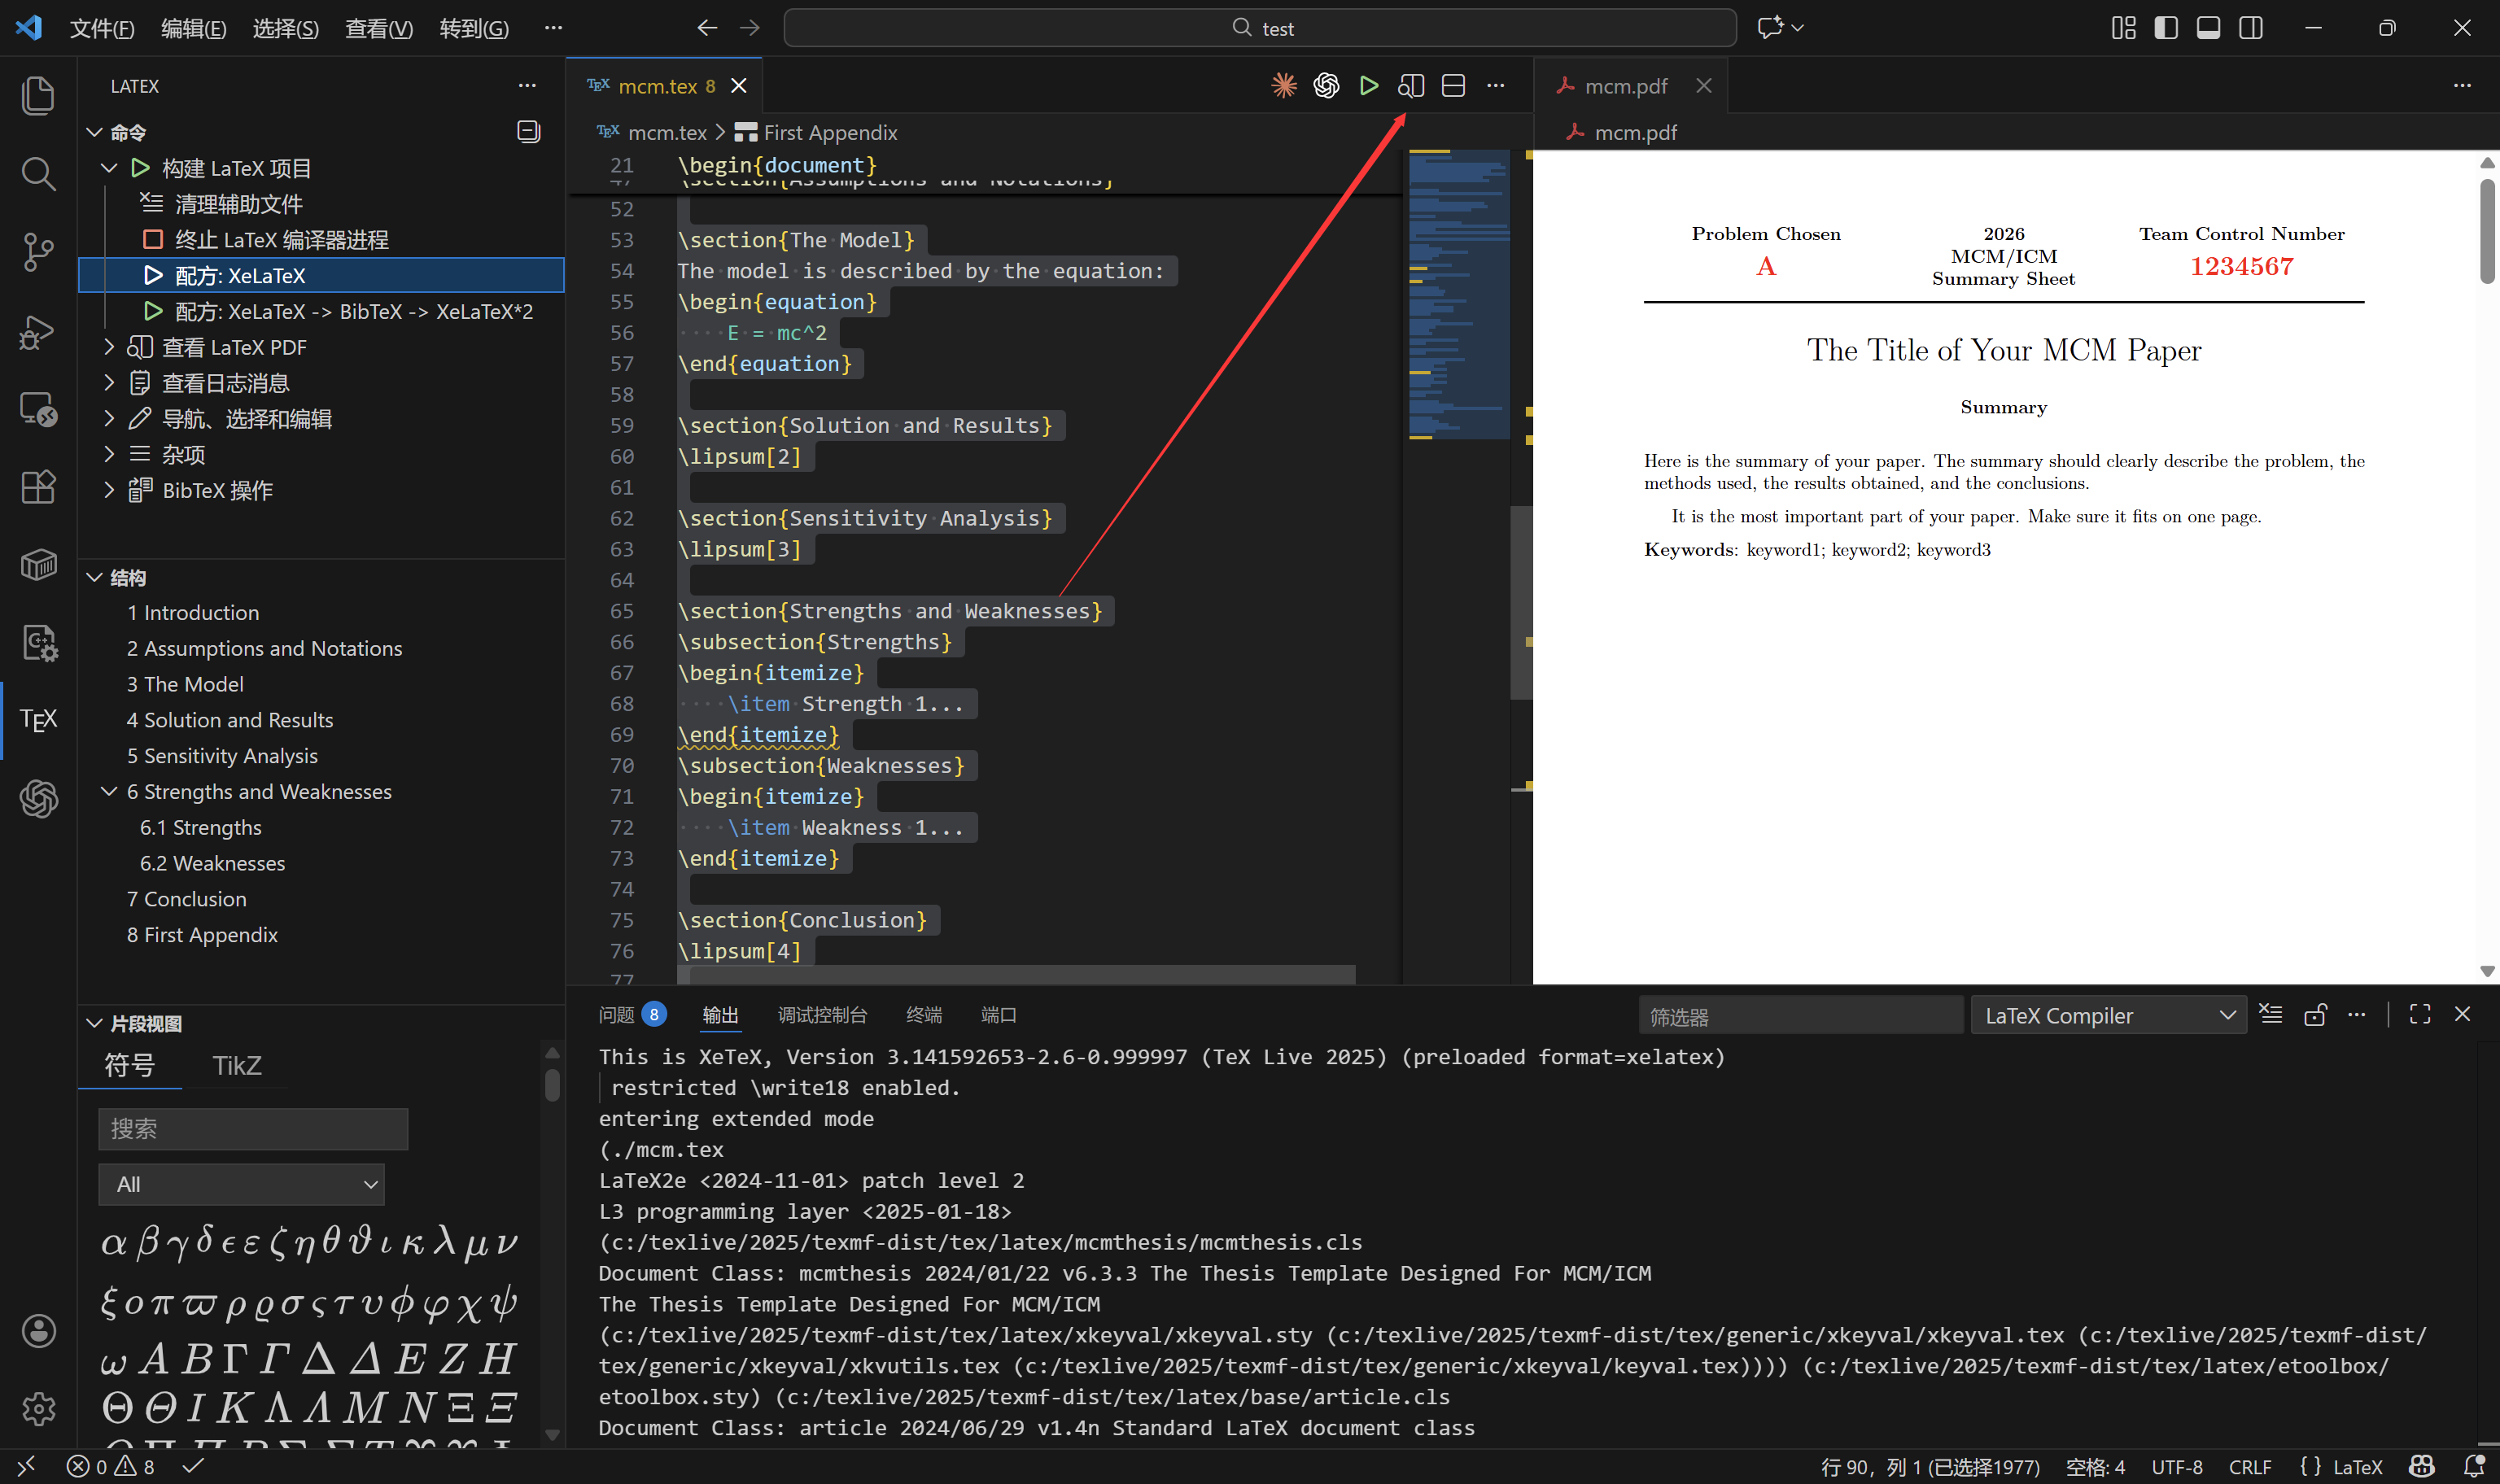
按ctrl+s保存自动编译或者手动编译(如下图),注意一定不要点第二个配方,会报错。
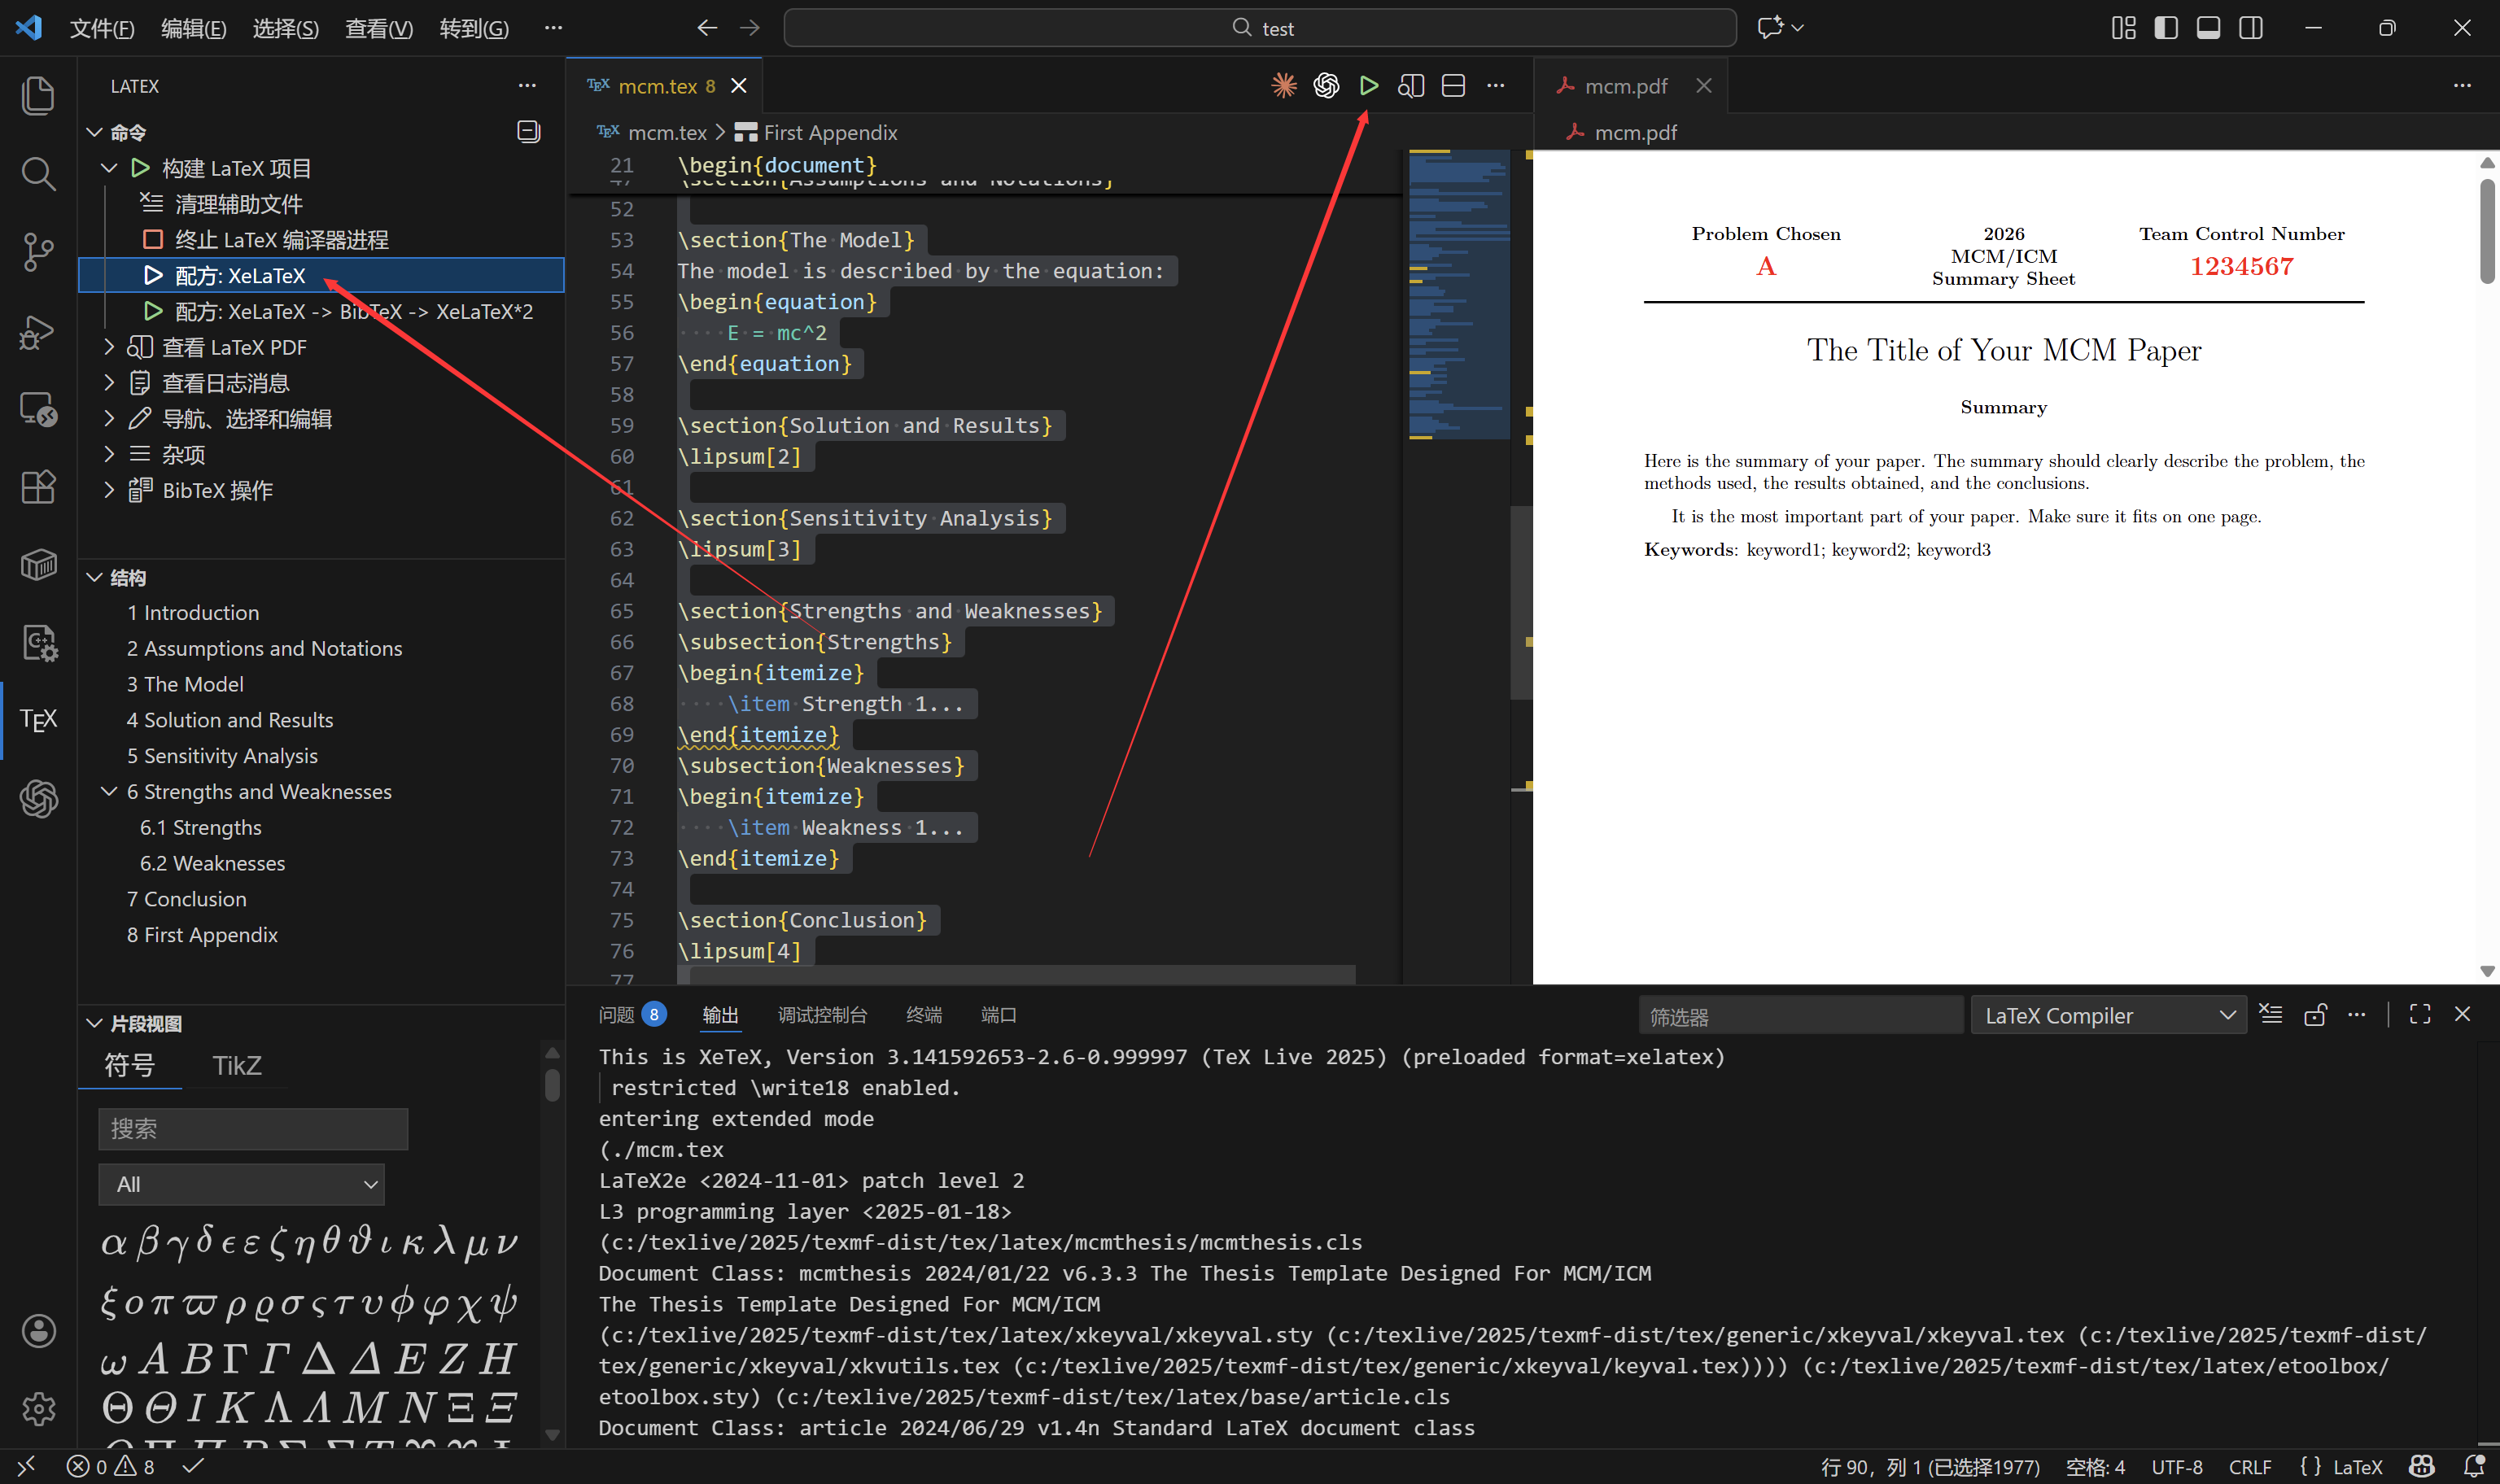
点击下图按钮可以打开预览
基础用法
文档基本骨架 (Structure)
一篇标准的 LaTeX 论文分为导言区 (Preamble) 和 正文区 (Body)。导言区用于加载工具包(宏包),正文区写内容 。
\documentclass{mcmthesis} % 1. 文档类型 (对于MCM使用mcmthesis)

% 2. 导言区:加载宏包
\usepackage{graphicx}  % 插图
\usepackage{amsmath}   % 数学公式增强
\usepackage{booktabs}  % 三线表

\title{My Paper}
\author{Team 123}

% 3. 正文区
\begin{document}
    \maketitle  % 生成标题页/摘要页

    \section{Introduction} % 一级标题
    Here is the text...

    \subsection{Problem Statement} % 二级标题
    ...
\end{document}
文本排版 (Text Formatting)
段落:空一行代表新起一段。源代码中回车键仅视为一个空格,不分段 。
列表:
无序列表(圆点):itemize 环境
有序列表(数字):enumerate 环境
\section{Assumptions}
\begin{itemize}
    \item Assumption 1: Friction is negligible.
    \item Assumption 2: Gravity is \( 9.8 m/s^2 \).
\end{itemize}
数学公式 (Mathematics)
这是 LaTeX 的最强项。你需要区分行内公式和行间公式 。
行内公式 (Inline): 嵌入在文字中,使用 \( ... \) 包裹。
行间公式 (Display): 独占一行并居中,使用 equation 环境(会自动编号)。
\begin{equation}

    E = mc^2 \label{eq:energy} % \label 用于后续引用

\end{equation}
插入图片 (Figures)
图片通常放在 figure浮动环境中,LaTeX 会自动调整位置(如放在页面顶部或底部)。plot.png需要放在同一目录下(如果专门建立了文件夹存放图片,例如文件夹名为figures,则需要将plot.png改为figures/plot.png)
\begin{figure}[htbp] % htbp 代表尝试放在: Here, Top, Bottom, Page
    \centering % 图片居中
    \includegraphics[width=0.8\textwidth]{plot.png} % 宽度设为页面宽度的80%
    \caption{Result of Simulation} % 图片标题
    \label{fig:sim_result} % 标签,用于文中引用
\end{figure}
插入表格 (Tables)
学术论文推荐使用三线表(只用横线,不用竖线),需要 booktabs宏包 。
\begin{table}[htbp]
    \centering
    \caption{Parameters}
    \begin{tabular}{lcr} % l=左对齐, c=居中, r=右对齐
        \toprule  % 顶线
        Name & Symbol & Value \\
        \midrule  % 中线
        Speed & \( v \) & 10 \\
        Time  & \( t \) & 5 \\
        \bottomrule % 底线
    \end{tabular}
\end{table}
提示:手写表格代码很痛苦,建议使用在线生成器(搜索 "LaTeX Table Generator")生成代码后复制进去。
交叉引用 (Cross-referencing)
这是“自动化”的精髓。不要手动写 "As seen in Figure 1",因为如果你前面插入一张图,编号变了你就得重写。
打标签: 在图、表、公式、章节命令后加 \label{key_name}。
引用: 在正文中使用 \ref{key_name}。
As shown in Figure \ref{fig:sim_result}, the error decreases rapidly.
Equation \ref{eq:energy} describes the relationship...
参考文献 (Bibliography)
对于初学者,手动管理(thebibliography)最直观,不依赖外部文件,容易debug。
\begin{thebibliography}{99}
    \bibitem{ref1} Author A. Title. Journal, 2020.
    \bibitem{ref2} Author B. Book Title. Publisher, 2019.
\end{thebibliography}

% 正文中引用:
According to \cite{ref1}, the model is stable.
进阶用法
编写高质量 MCM/ICM 论文时,进阶用法能极大地提升排版效率和文档的专业度,特别是自动化参考文献管理、代码高亮和文件分块管理。
使用 BibTeX 自动化管理参考文献
第一步:创建 .bib 数据库文件
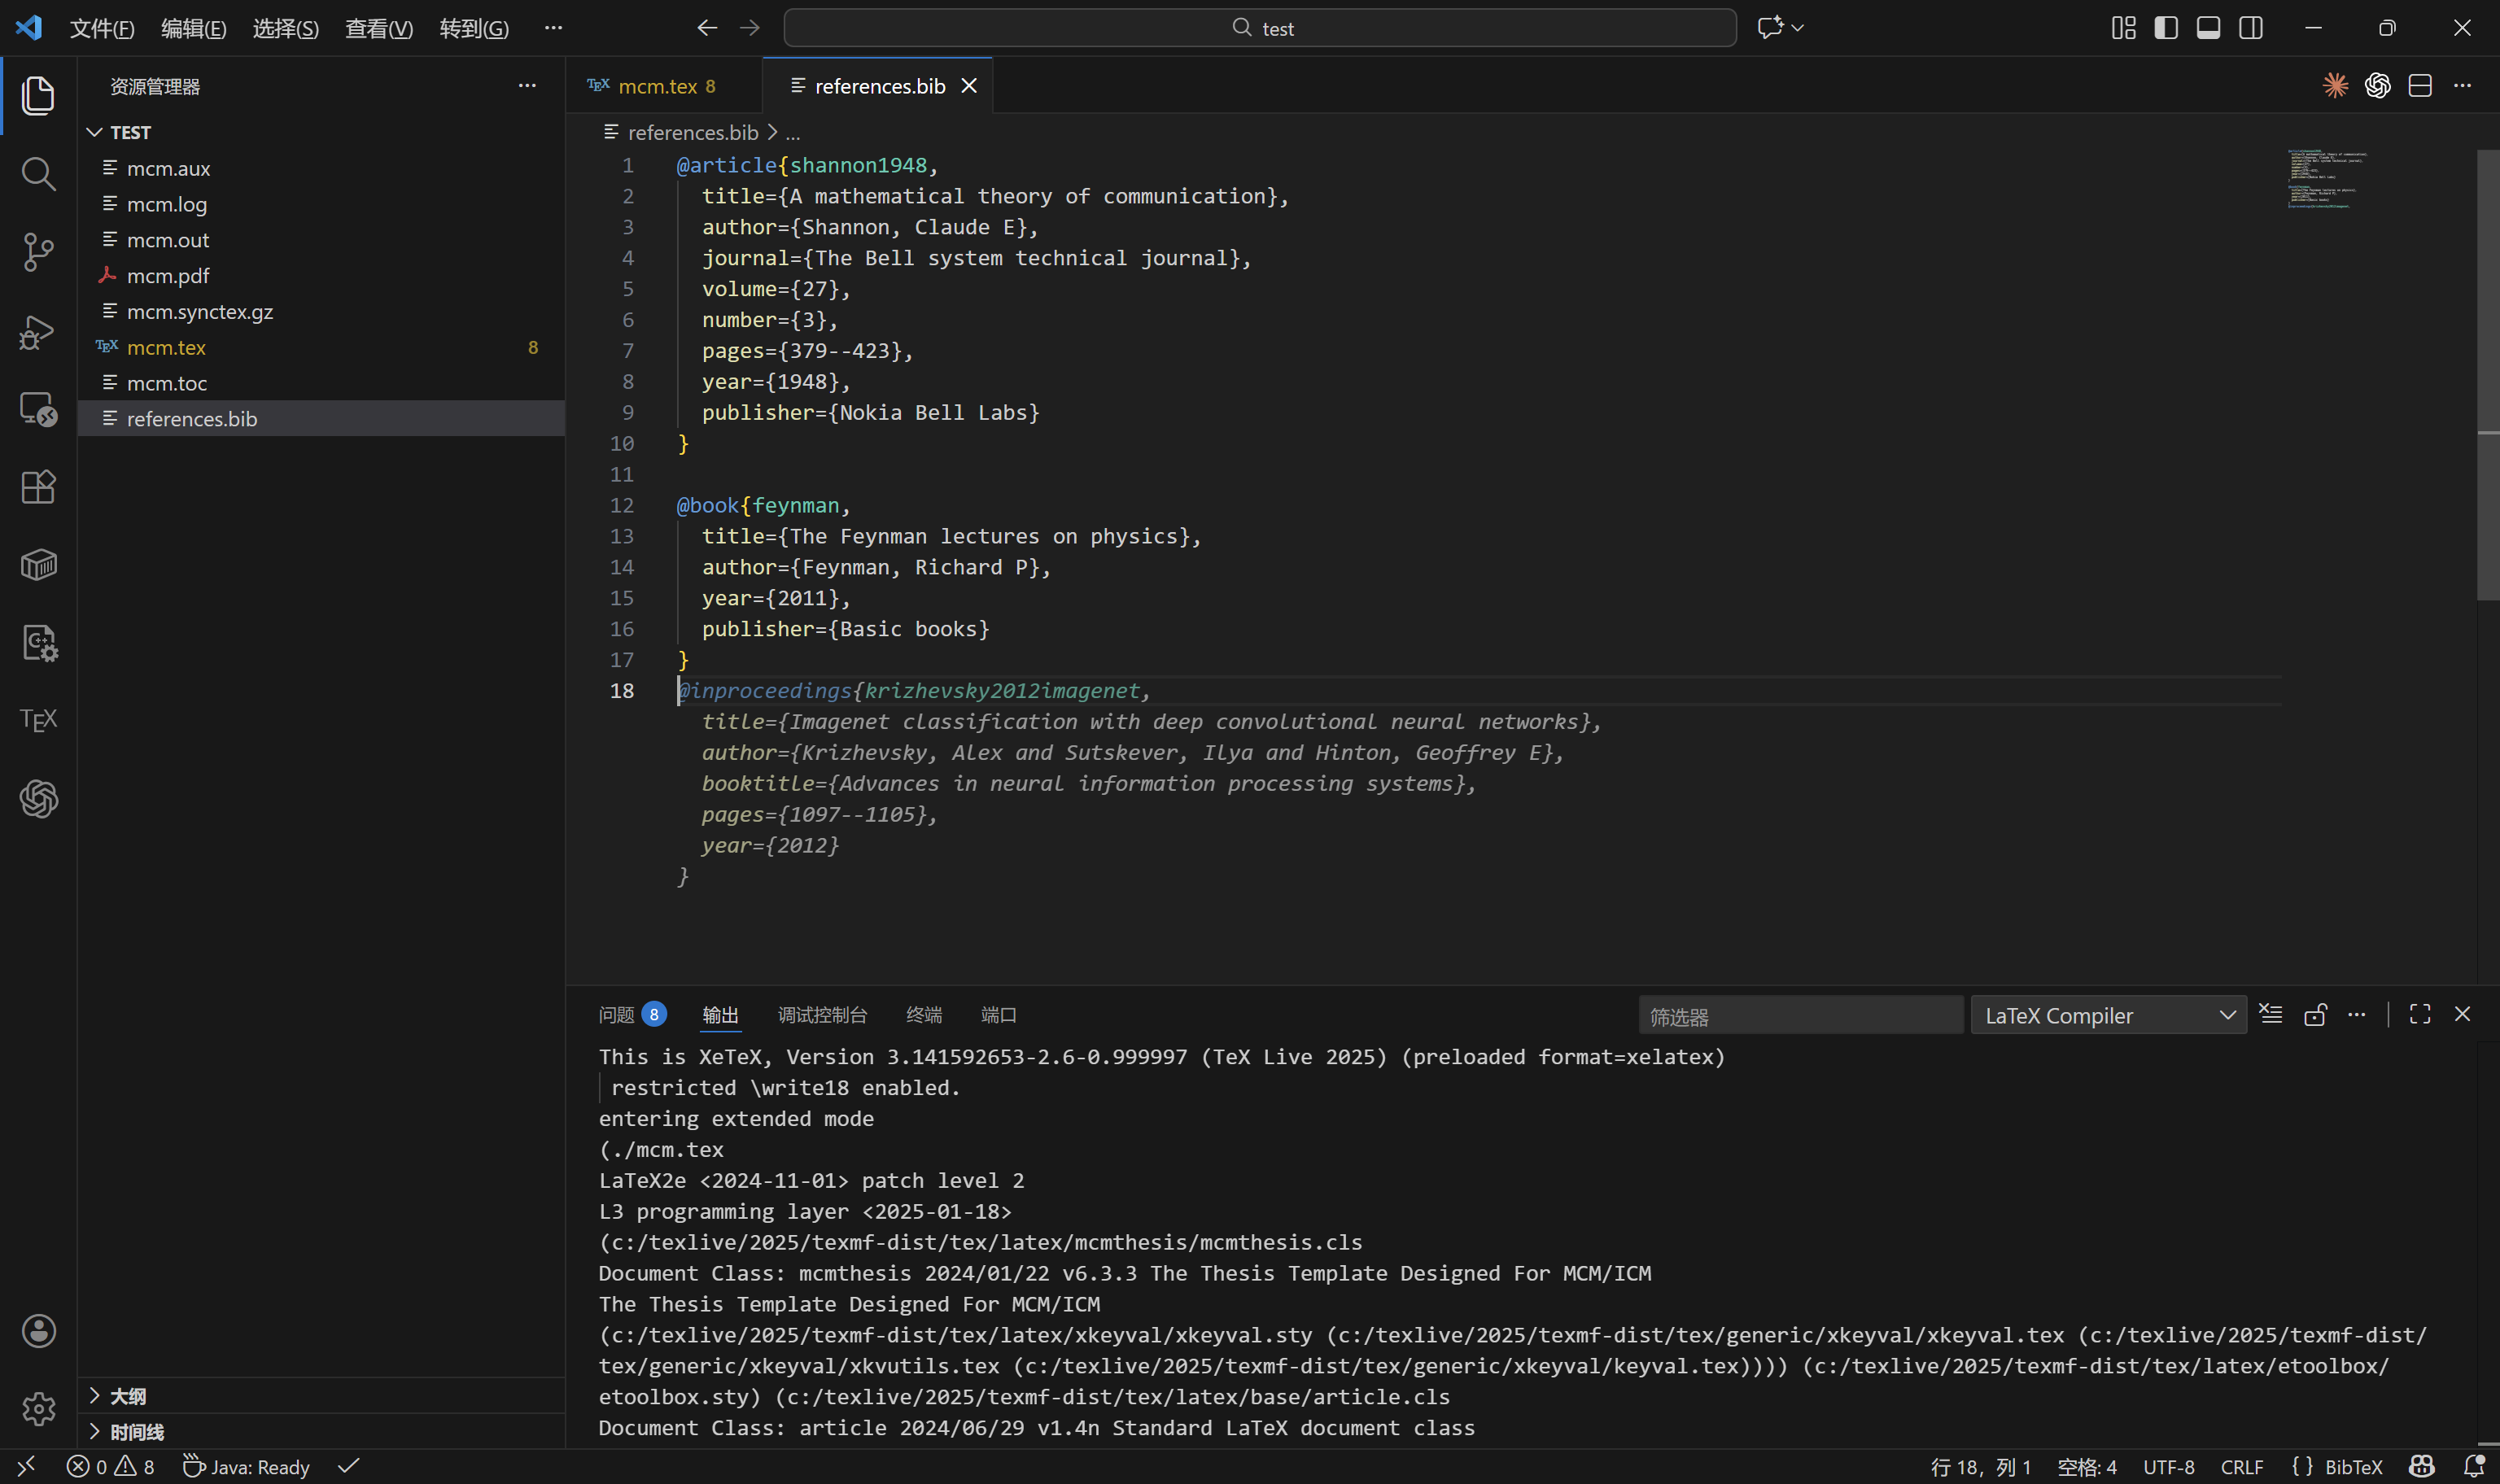
在 .tex 同级目录下,新建一个纯文本文件,命名为 references.bib。
去谷歌学术 (Google Scholar) 搜索文献,点击 "Cite" -> "BibTeX",复制内容进去。
例如
@article{shannon1948,
  title={A mathematical theory of communication},
  author={Shannon, Claude E},
  journal={The Bell system technical journal},
  volume={27},
  number={3},
  pages={379--423},
  year={1948},
  publisher={Nokia Bell Labs}
}

@book{feynman,
  title={The Feynman lectures on physics},
  author={Feynman, Richard P},
  year={2011},
  publisher={Basic books}
}
第二步:在 LaTeX 中调用
示例:(说明,这里编译需要使用第二个配方,否则不会自动引用)
\documentclass{mcmthesis}
% ... 其他宏包 ...
\begin{document}
% ... 正文 ...
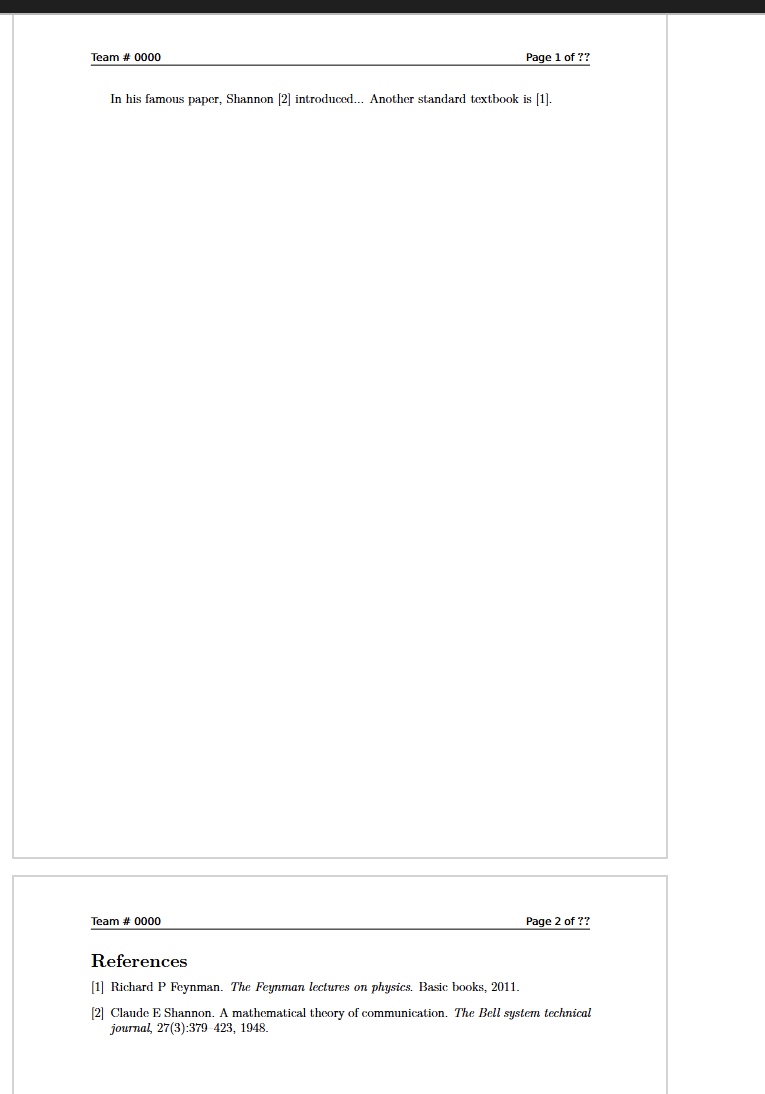
In his famous paper, Shannon \cite{shannon1948} introduced...
Another standard textbook is \cite{feynman}.
% --- 插入参考文献 ---
\newpage
\bibliographystyle{plain} % 风格:plain(标准), unsrt(按引用顺序), ieeetr(IEEE)
\bibliography{references} % 对应 references.bib 文件名(无需后缀)
\end{document}
效果如图
代码高亮 (Listings)
MCM 论文通常需要在附录展示代码。直接粘贴文本太丑,使用 listings 宏包可以实现代码着色 。
在导言区配置样式:
\usepackage{listings}
\usepackage{xcolor}

\lstset{
    language=Python,           % 语言:Python, Matlab, C++
    basicstyle=\ttfamily\small,% 字体字号
    keywordstyle=\color{blue}, % 关键字颜色
    commentstyle=\color{gray}, % 注释颜色
    stringstyle=\color{red},   % 字符串颜色
    numbers=left,              % 行号在左侧
    numberstyle=\tiny,         % 行号字体
    frame=single,              %加边框
    breaklines=true            % 自动换行
}
在正文/附录中使用:
\begin{appendices}
\section{Python Code for Model A}
\begin{lstlisting}
import numpy as np

def calculate_energy(m):
    # This is a comment
    c = 299792458
    return m * c**2
\end{lstlisting}
\end{appendices}
高级数学公式技巧
使用 align 环境处理多行推导,比 equation 更强大。需要 amsmath 宏包 。
\begin{align}
    f(x) &= x^2 + 2x + 1 \label{eq:step1} \\ % & 是对齐位置,\\ 是换行
         &= (x + 1)^2    \nonumber       \\ % \nonumber 表示这一行不编号
         &\ge 0          \label{eq:result}
\end{align}
并排图片 (Subfigures)
如果需要将两张图横排对比,使用 subcaption 宏包 。
\usepackage{subcaption} % 导言区加载

\begin{figure}[htbp]
    \centering
    % 第一张子图
    \begin{subfigure}[b]{0.45\textwidth}
        \includegraphics[width=\textwidth]{fig_a.png}
        \caption{Before Optimization}
    \end{subfigure}
    \hfill % 中间弹性填充
    % 第二张子图
    \begin{subfigure}[b]{0.45\textwidth}
        \includegraphics[width=\textwidth]{fig_b.png}
        \caption{After Optimization}
    \end{subfigure}

    \caption{Comparison of results}
    \label{fig:compare}
\end{figure}
评论